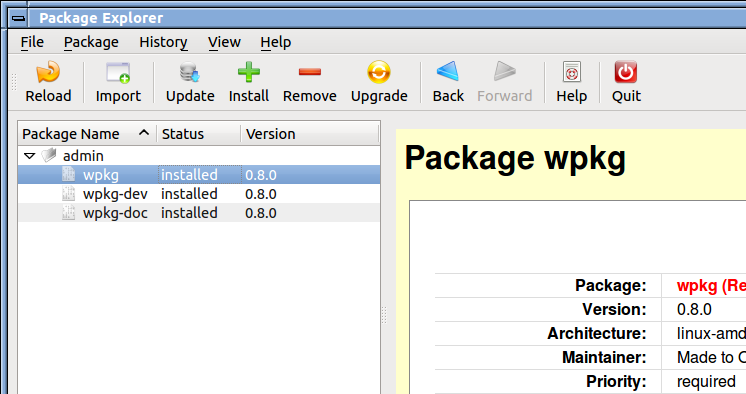
Package Explorer Quick Cheat Sheet
Setup Your Target
Click on File » Set Database Root (Ctrl-D) and define the path where your want your files to be installed.
This directory is where you get all the files as defined in the data.tar.gz file.
It will also include the database of the target under .../var/lib/wpkg/...
Setup Your Sources
If you have a sources directory, then use File » Manager Package Source (Ctrl-S) to add it to the list of managed sources. This allows you to make use of the Package » Update (Ctrl-C) and Package » Upgrade (Ctrl-U) features.
You can create a sources directory with the wpkg --create-index command.
When you click Ok, Package Explorer asks you whether you want to update right away. Saying Yes is safe and the expected course of action so you get all the newest available index.tar.gz files in your target system.
Importing
When you create standalone packages (opposed to packages in a sources) then you can directly import them in your target system with the Package » Import (Ctrl-T) option. This is the most practical option if you are working on a project and want to test that its package works as expected. It is, however, quite tedious to use if you have many sources scaterred all over the place. In that case, the install / update / upgrade options is better suited.
If you installed sources, missing dependencies will also be installed using those sources as package repositories to satisfy those dependencies.
Updating
Once you installed your sources, you can update your target system with the Package » Update (Ctrl-C) option. The update loads all the sources index.tar.gz files locally so the target system can quickly list all the available packages.
Note that when you first install a source, the system detects that and offers you to update immediately. This is done so you do not forget to do an update before an install or upgrade (otherwise that new source would not count.)
Installing
With sources defined and updated you can decide to install packages. Select Package » Install (Ctrl-I) to see the list of packages available in your sources, select the ones you want to install, then click Apply. The system will gather all the information about what is going to installed (i.e. at times you select packages that have dependencies that need to be installed first.) At that point you can confirm or cancel the request. If you confirm, all those packages are installed on your target system.
Note that the list of packages appearing in the Install window come from the sources. If your sources were not properly defined or you did not update them, then the install window will be/remain empty. In this case, you may want to try the Package » Import (Ctrl-T) feature instead.
Removing
Select one or more packages in the browser (left column) and click on Package » Remove (Del) to remove them. A dialog opens giving you additional options and a chance to cancel in case a package you selected should not be removed. Note that some packages may be required by others. If you do not turn on the Recursive option (click Options at the bottom left) then the whole process will fail with an error and no packages will be removed. The Recursive option can be dangerous since it will remove all the packages that need to be removed and that may include packages you wanted to keep.
By default the remove feature does just a --remove. This means you do not lose your configuration files. You may select the Purge option to remove everything, including control files and their backups.
Upgrading
The Package » Upgrade (Ctrl-U) function checks the current installation target for packages that can be upgraded, which means installing newer version of packages that are currently installed in your target system.
The upgrade function is similar to an install of packages that are already installed with a newer version found in one of your sources. If all packages are up to date, then the upgrade function does nothing (the window that opens remains empty.)
The GUI side of the Windows Packager
Package Explorer

